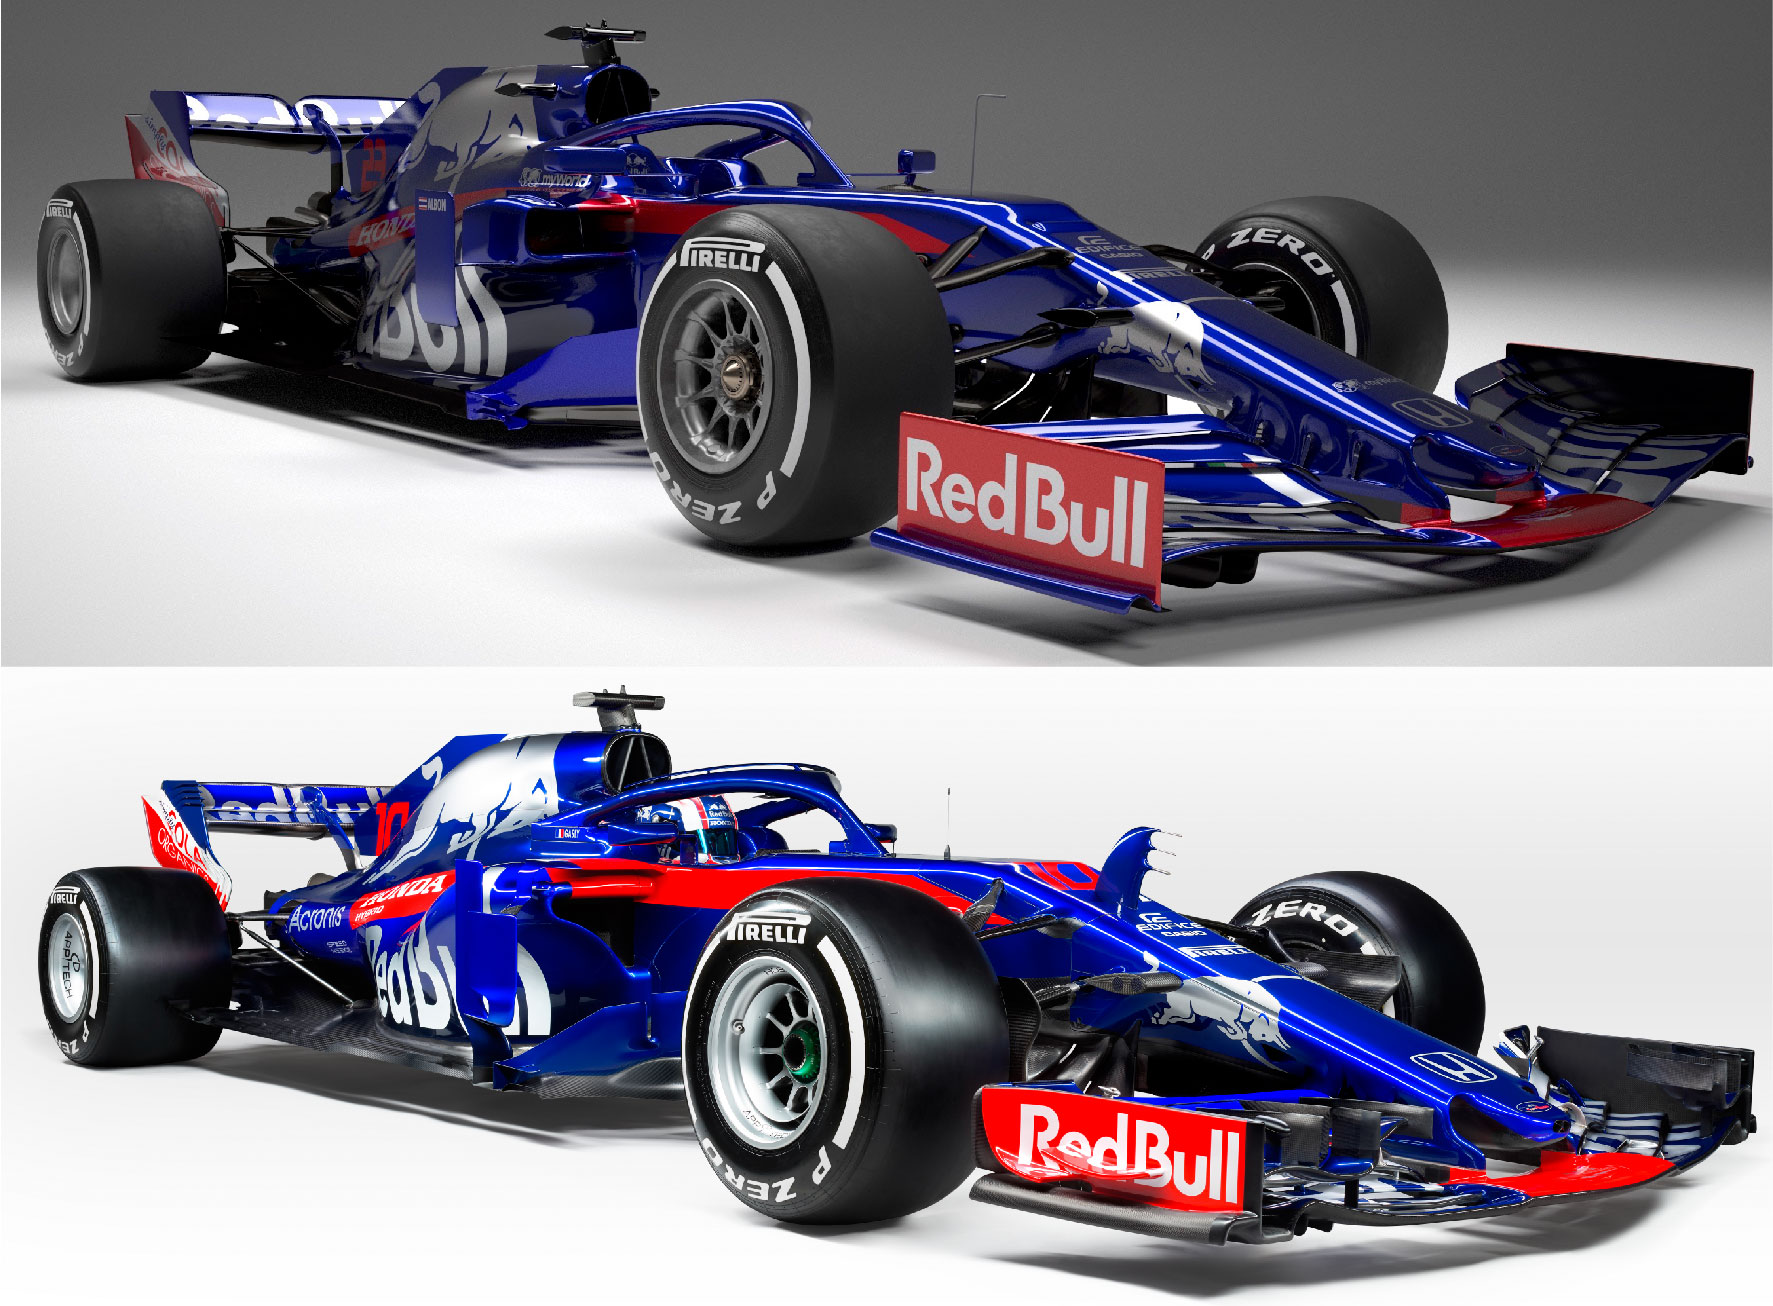

Scuderia Toro Rosso STR14
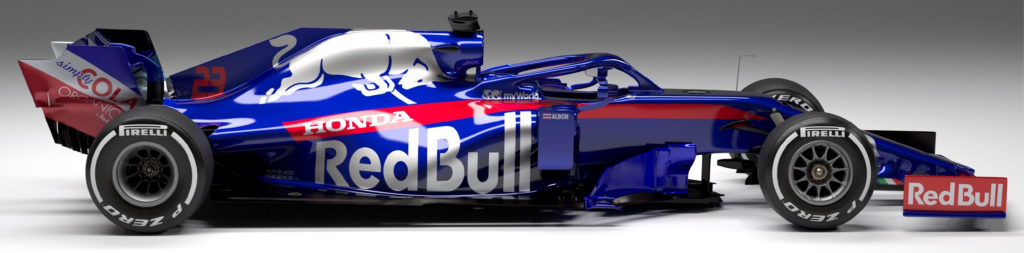
Toro Rosso revealed their 2019 challenger – the STR14 – through a thrilling launch video, which shows a ‘moodier’ version of last year’s car, complete with a new front wing, new rear wing and new bargeboards, along with many other changes.
https://www.youtube.com/watch?v=14FLAUOIbl4
As with all of the 2019 contenders, the biggest differences are found in the front wing design. With the 2019 aero rules stipulating that the front wing needs to be 200mm wider and 20mm higher than 2018, and much more simplistic.
Check out the full technical analysis of the STR14 in our September 2019 issue!

‘One of the intended purposes of the 2019 regulation changes was to reduce the amount of outwash generated, which leaves us with the challenge of reconstructing the required flow structures to recover the lost load within the scope of the new regulations,’ explains Jody Eggington, Deputy Technical Director at Toro Rosso. ‘Although the front wing width has been increased, we’ve lost the winglets and the elements which were on the outboard portion of the main plane and the endplate itself is simplified. Together with the simplification of the front brake ducts, the opportunities for generating the required flow structures and positioning them where you want are different, and require you to recover the size and trajectory of the front wheel wakes and flow structures by identifying key areas for aerodynamic development and exploiting these to the maximum.’

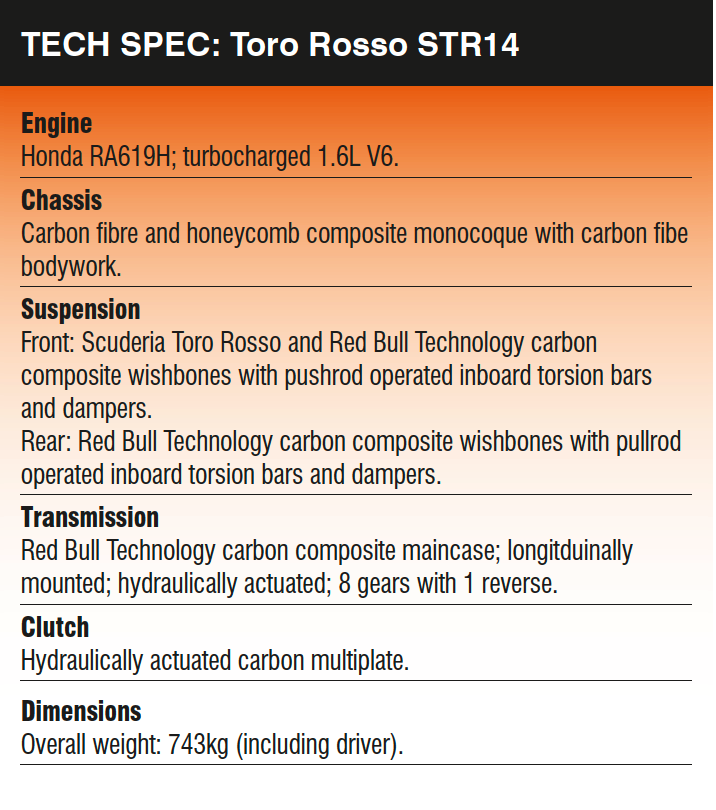
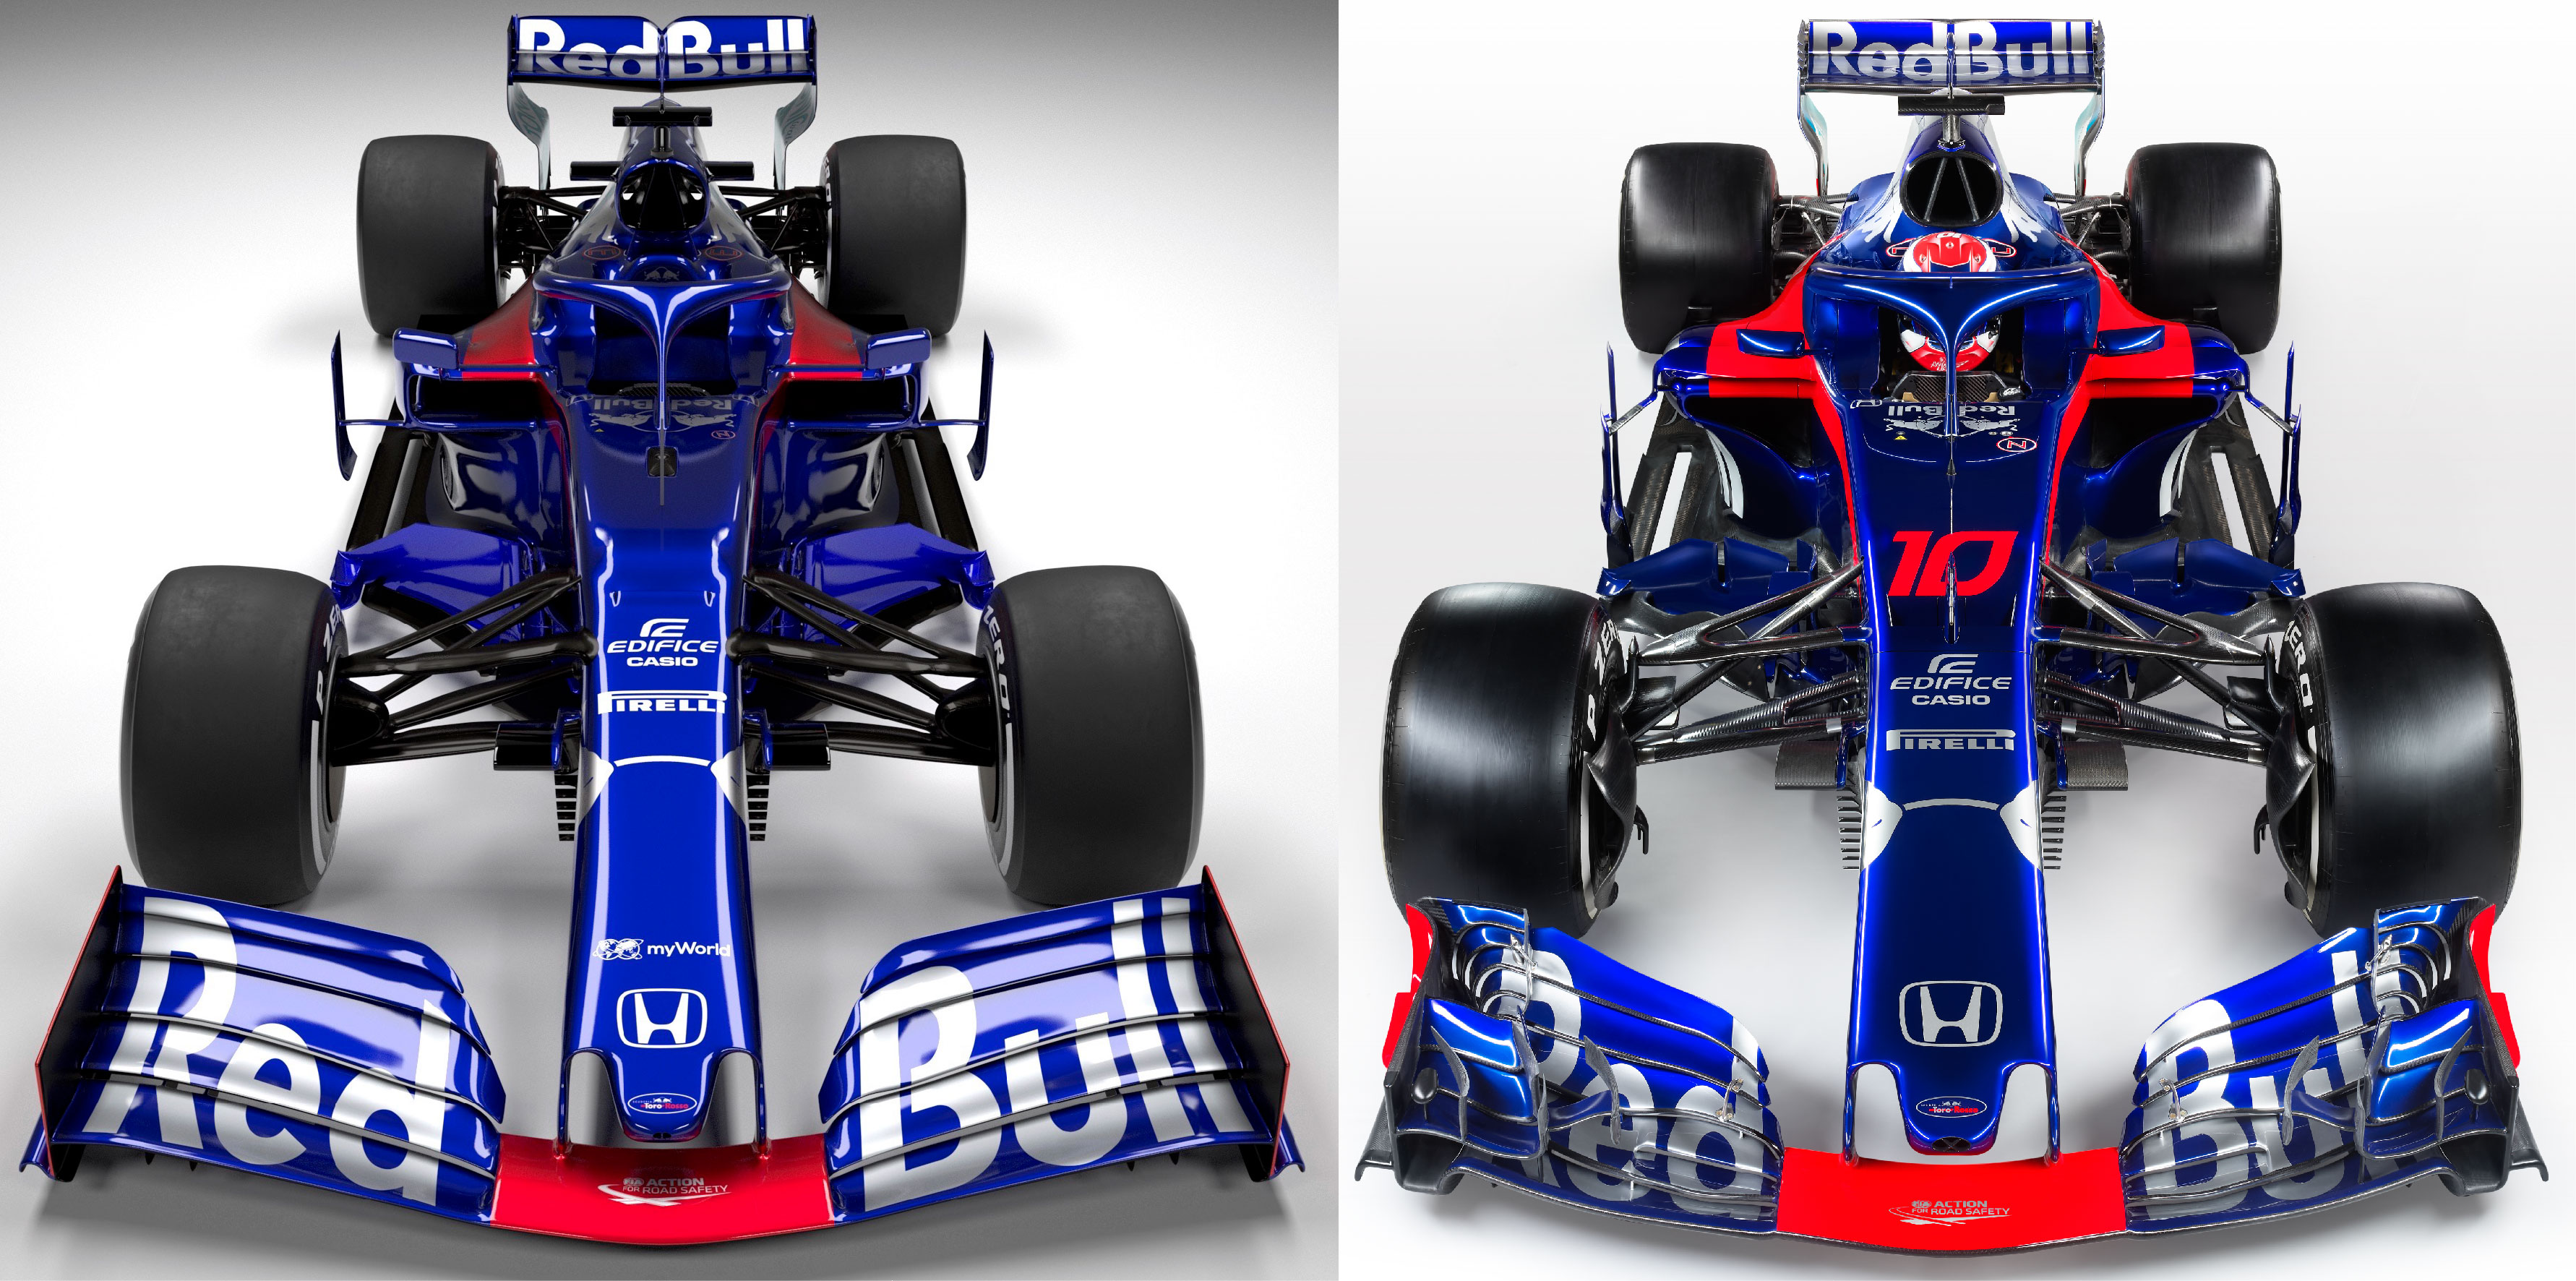
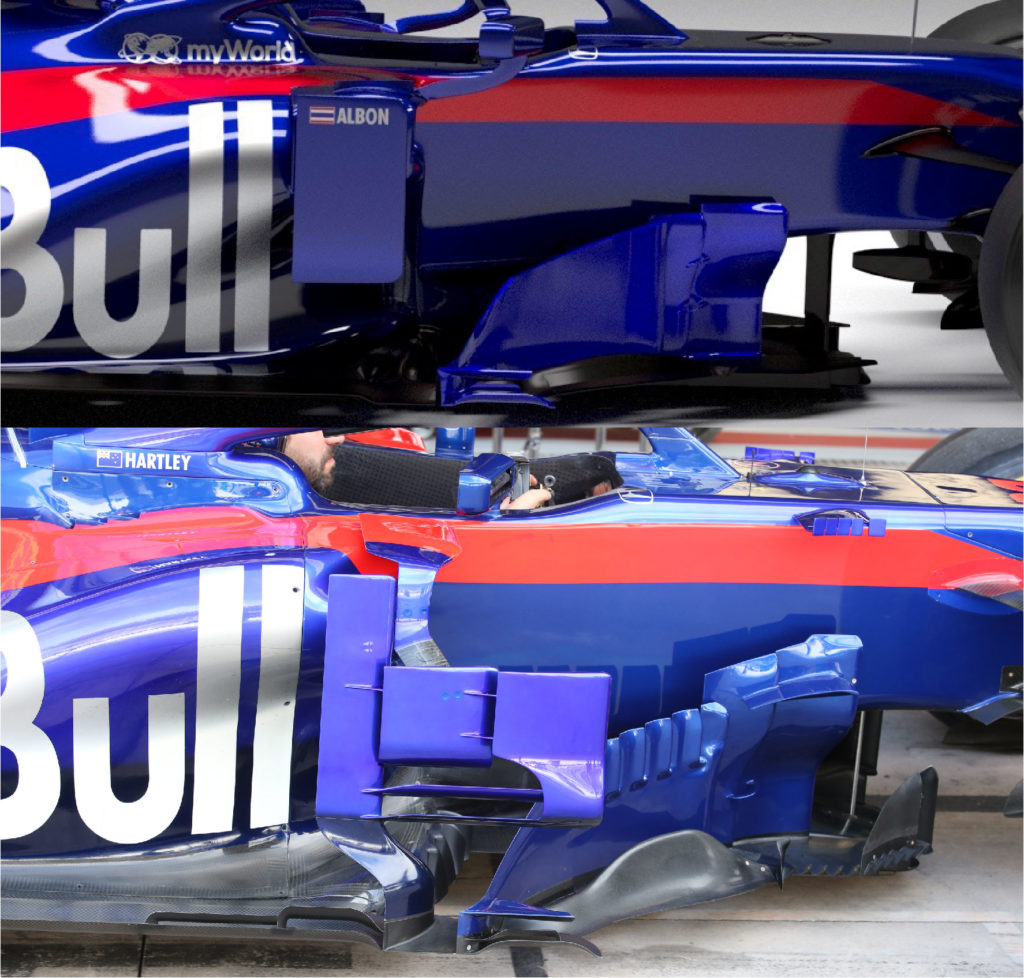
From the studio shots, we can see clearly the effect of removing the complex array of winglets and elements on the outboard portion of the wing that Eggington is referring too. Furthermore, the Toro Rosso STR14 features a simplistic vertical endplate with a much smaller footplate at the bottom, compared to the STR13, as highlighted below.
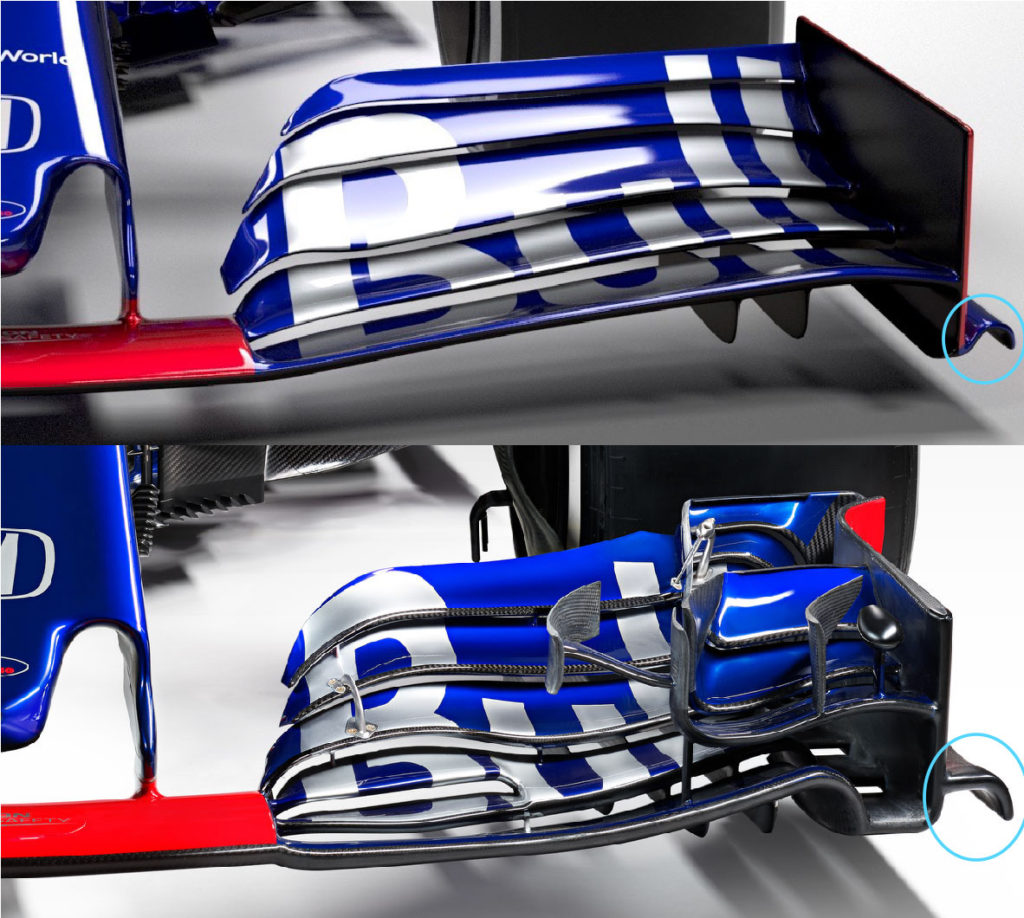
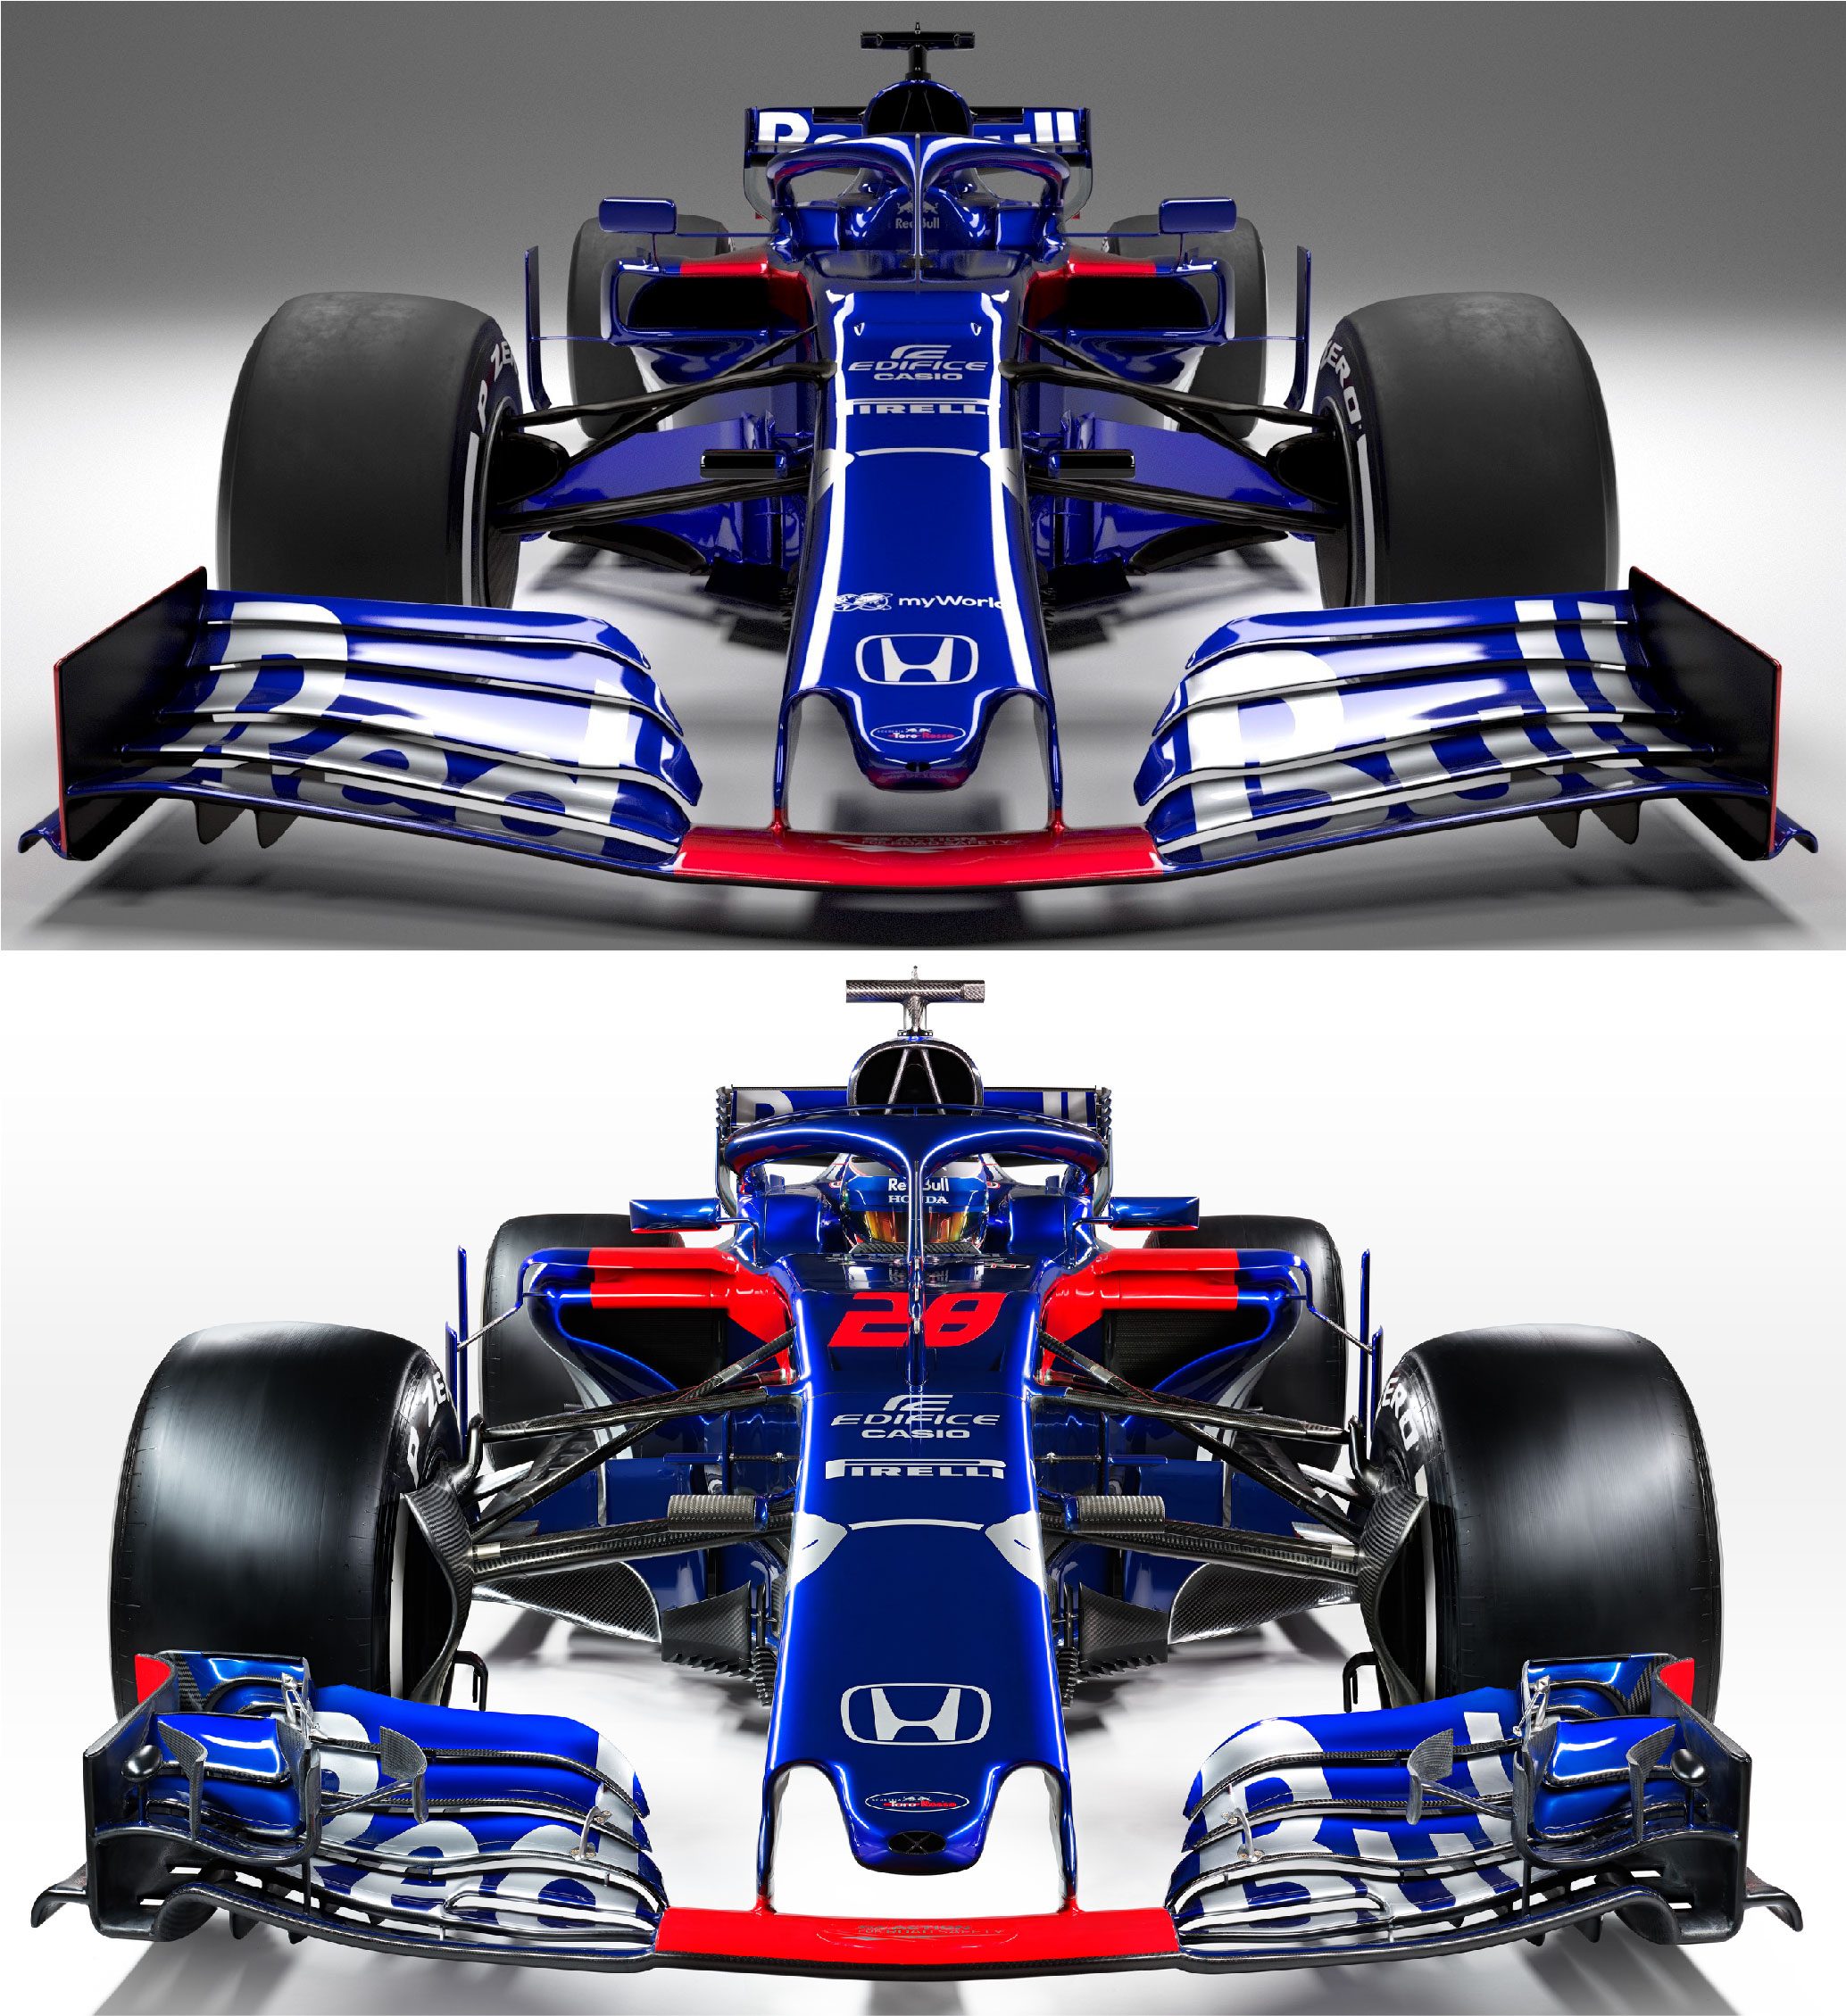
Furthermore, there are only two strakes on the underside of the STR14’s front wing, compared to several on the STR13. This is another regulation change that has driven the design of the front wing to be more simplistic, all with the aim of minimising outwash and increasing overtaking.

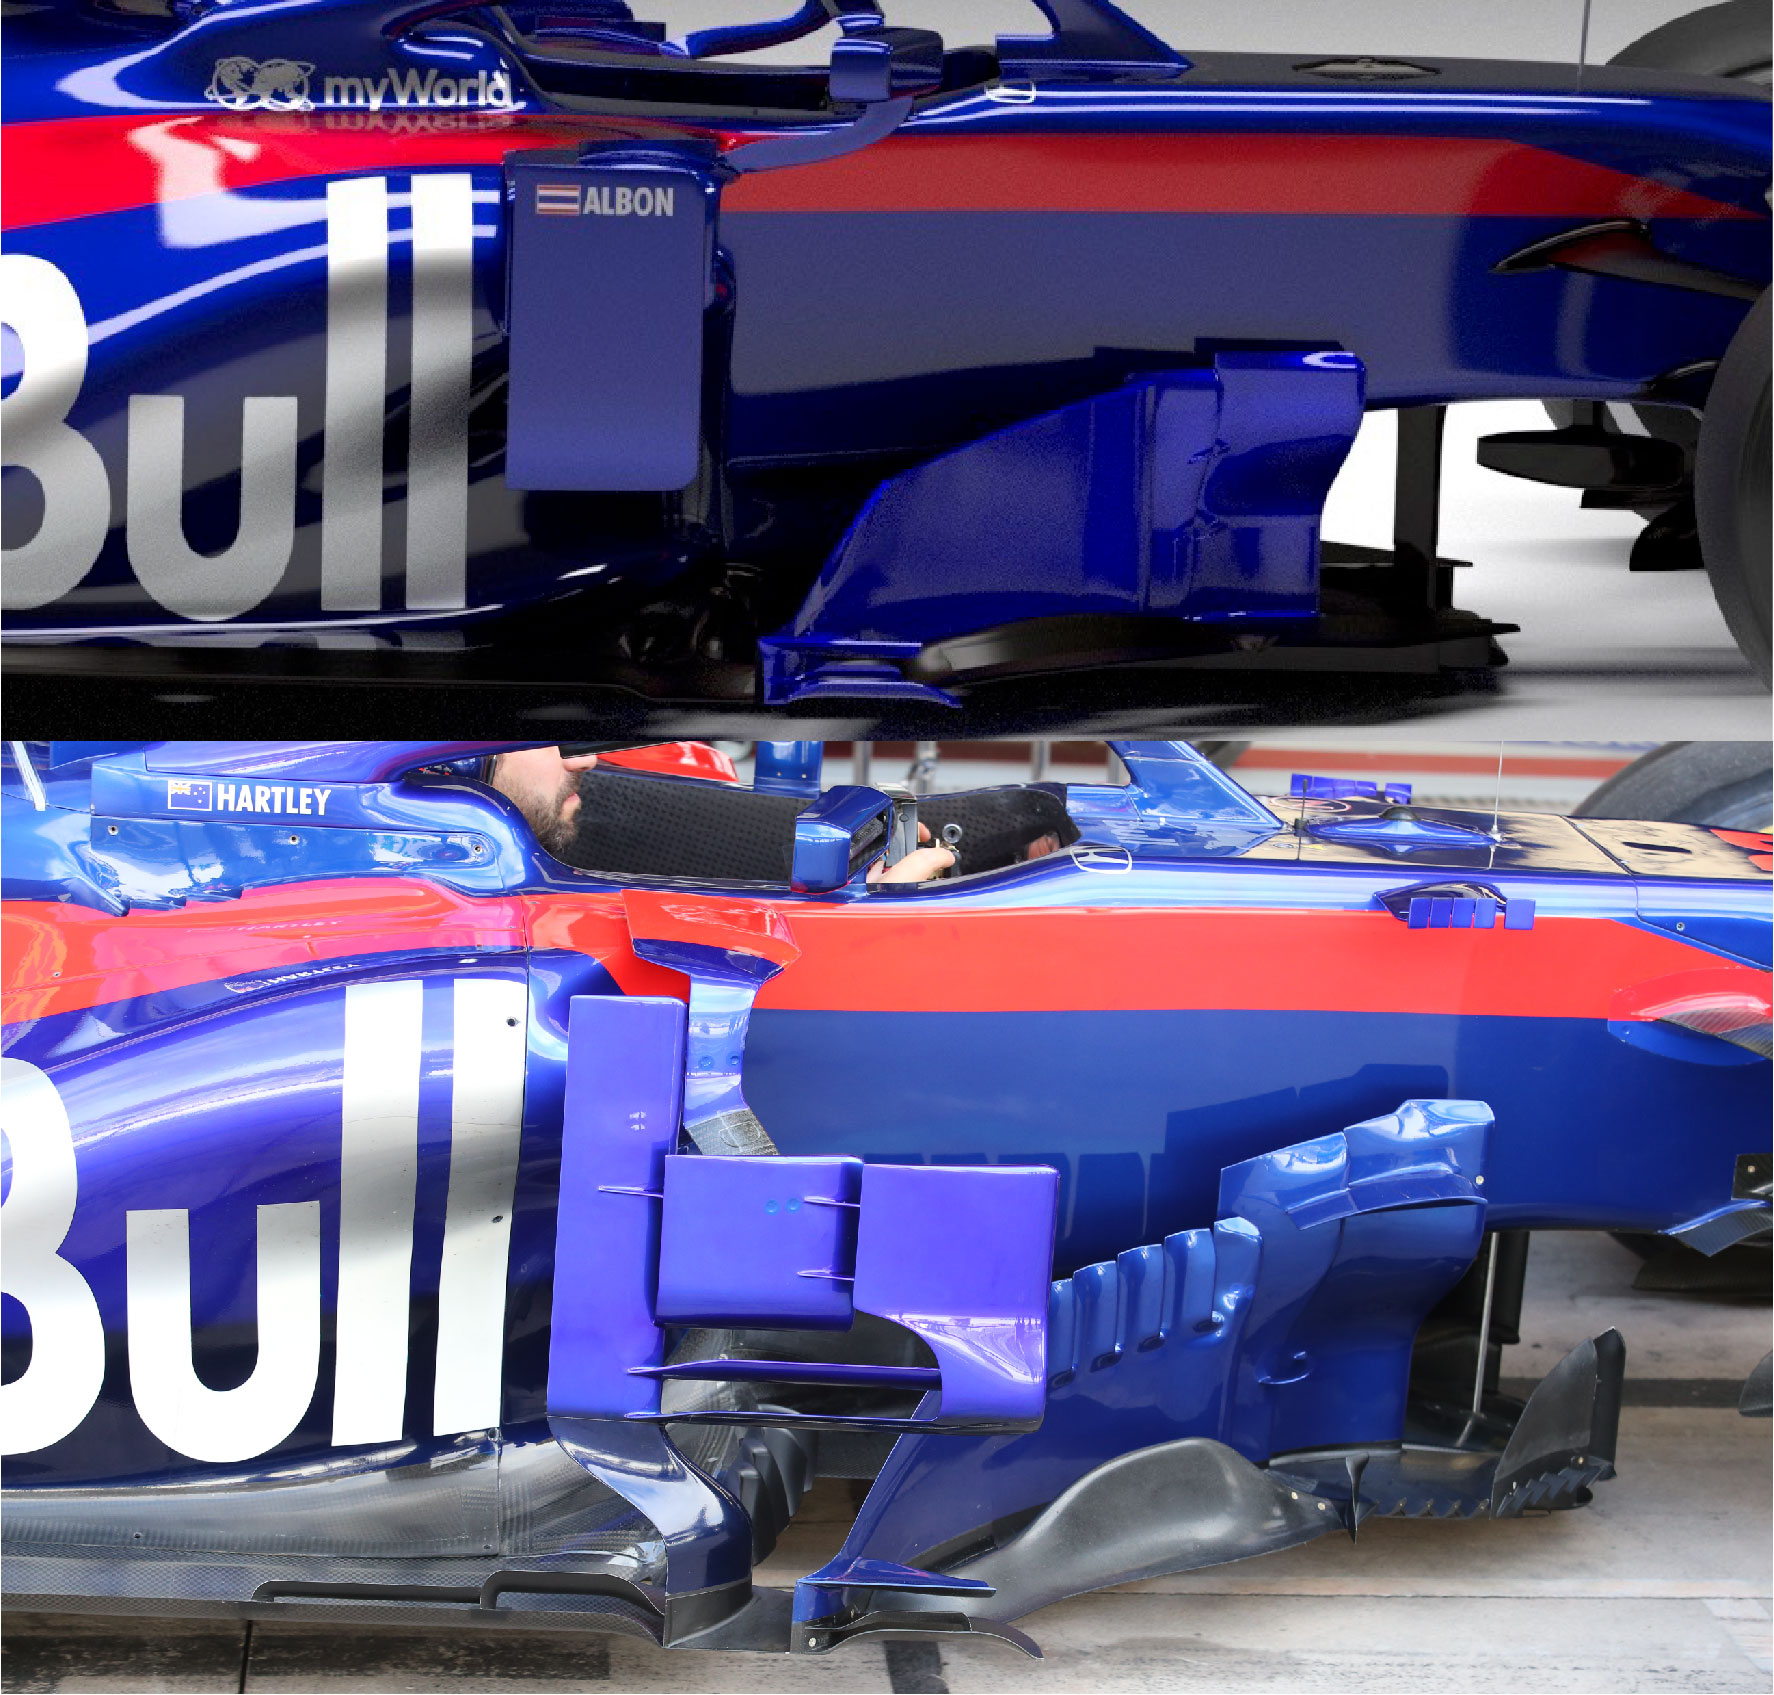
The bargeboards are another area of change and the regulations have made the 2019 variants 150mm shorter as well as moved them 100mm forwards as illustrated by the regulation drawings below.

Although it is difficult to see the 100mm move forwards, the differences in bargeboard design between 2019 and 2018 are clear. Although the 2019 designs will undoubtedly adapt as the season progresses and teams bring new upgrades to the table.
For the second year running, Toro Rosso will be racing with their Honda RA619H power plant, which was successfully fired up on the 8th of February this year.
‘There have been no real changes to the rules regarding the PU, apart from being allowed to use 5kg more fuel per car in the race, explains Toyoharu Tanabe, Honda F1 Technical Director. ‘Therefore, our development work has really been a continuation of what we have been doing over the past year. Naturally, with no racing over the winter, the work in Japan and Milton Keynes has stepped up in preparation for the new season. Plus, we have had to deal with preparation for also supplying Red Bull Racing. By working with the Red Bull Technology group, we have been able to streamline that process, in many areas dealing with matters relating to both cars at the same time. We have been looking at all areas of the PU such as ICE, ERS and Energy store.’

With Toro Rosso‘s bigger brother, Red Bull Racing, switching to the Honda PU for the first time has led to some important advantages for both teams. Although Honda are keen to promote the fact that they are not only supplying both teams with identical technical hardware (as required by the regulations), but they will also treat the teams equally in terms of the resources allocated to managing the PU as well as its development throughout the season.
Of course, this equality is much easier for Honda with Toro Rosso and Red Bull Racing being part of the same family. This, has also allowed the two Red Bull teams to collaborate, but only where permitted. ‘The chassis itself, as per the regulations, is a complete Toro Rosso design and IP as is the front outboard suspension, along with all aspects of the cooling systems, power unit installation & steering column. The ‘rear end’ has been provided by Red Bull Technology and the key change for Toro Rosso, being that we are taking a gearbox casing and rear suspension although many of the internals of the gearbox are similar to parts we have used in the past,’ says Eggington. ‘Having committed to parts supply from Red Bull Technology, a lot of effort has to be put to integrate everything as well as possible and of course, this remains under the sole control of Toro Rosso. In that respect, we’re excited to join Toro Rosso and Red Bull Technology. Synergy is a concept we as a team have embraced, it has several positives which gives us the ability to refocus our design effort on other areas and resources that come with it, whilst receiving parts which are proven trackside.’
Another advantage for Toro Rosso and Honda, is that Red Bull Racing will now be able to plummet its resources into the dyno activities to help the development process of the PU. Therefore, Toro Rosso have been able to put more of its resources into the integration and cooling package of the PU. ‘With synergy and Red Bull Racing taking the Honda PU, we have been able to reallocate resource to different activity which has provided some benefit in terms of adding capacity to some areas which up to now were maybe limited,’ highlights Eggington. ‘Generally, there are many positives for having a focussed approach to which parts of the car originate in Toro Rosso and which parts are purchased. We now have an even more flexible design office and the people involved have really embraced the synergy project and taken on board new challenges.’
Overall, the STR14 offers us the first real insight into the effects of the 2019 rule changes. However, only when the cars are running at testing will we fully understand these effects, and the reasoning behind them. Even then, teams won’t be running in their final configurations – we will have to wait until the opening round at the Australian Grand Prix for that.
Keep up to date with all the latest motorsport technology with a Racecar Engineering subscription