

Sponsored content in association with
Graphite Additive Manufacturing explains how advanced materials and manufacturing techniques, originally honed in motorsport, are now driving clean energy solutions
Motorsport is known for its relentless pursuit of innovation, where performance, weight, and efficiency are pushed to the absolute limits. While these developments are often born out of the need to gain fractions of a second on the track, the technology that powers racing cars frequently finds new applications in other industries. One such example is how advanced materials and manufacturing techniques, originally honed in motorsport, are now driving clean energy solutions. Graphite Additive Manufacturing has seen this crossover first-hand through their work with Intelligent Energy, where motorsport expertise has contributed to the development of lightweight and highly efficient enclosures and casing components for their hydrogen fuel cells, which power drones.
At the heart of this collaboration is Sinterworx G4, a material originally developed for high-performance motorsport applications. Racing teams demand materials that are not only lightweight but also incredibly tough, capable of withstanding extreme forces and conditions without failure. G4 was born from these requirements and has proven to be an ideal solution for Intelligent Energy’s hydrogen fuel cell enclosures.
Design freedom and complexity are key aspects of why G4 was selected for this application. In motorsport, teams constantly push the limits of design to optimise performance, and this ethos is equally important in drone technology, where weight savings and efficiency are critical. Traditional manufacturing methods often restrict design due to tooling limitations and material constraints. However, additive manufacturing with G4 removes these barriers, allowing for complex designs that can be fully optimised without the constraints of traditional manufacturing. Intelligent Energy was able to take full advantage of this design freedom to create intricate, highly efficient casings that protect the fuel cells while maintaining a minimal footprint.
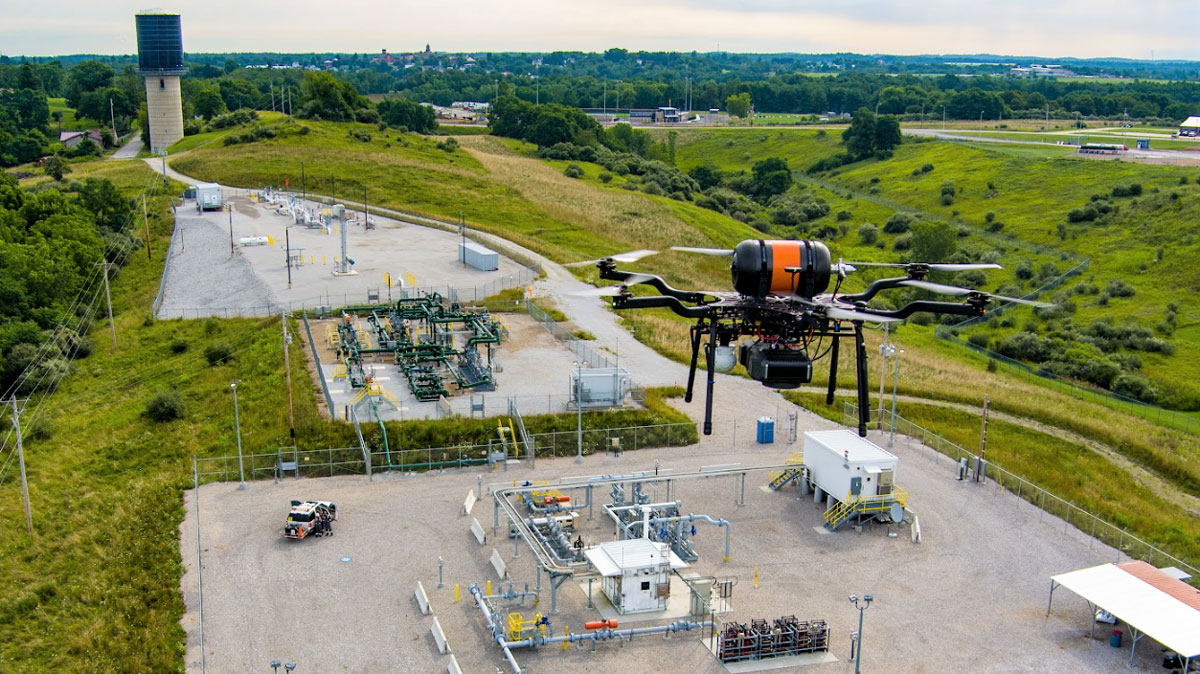
One of the biggest challenges in the drone industry, much like in motorsport, is weight reduction. Every gram saved in a drone means longer flight times and more efficient operations. Intelligent Energy needed their fuel cell enclosures to be as light as possible, and after extensive testing, they settled on a wall thickness of just 1.1mm. However, achieving this level of thinness while maintaining the necessary structural integrity was no easy task. They evaluated and tested several 3D printing materials, but none offered the stiffness required at such a thin wall — until they tried Sinterworx G4. G4’s unique composition provided the additional stiffness and strength needed to protect the delicate internal components of the fuel cell, without adding unnecessary weight.
In addition to its mechanical properties, G4 offers on-demand production without the need for expensive tooling. This is crucial not only for motorsport teams, who constantly update and modify their designs, but also for companies like Intelligent Energy that require rapid iterations and design changes to stay at the forefront of their industry. By using G4, Intelligent Energy can quickly adapt and evolve their designs without incurring significant delays or costs, making the process much more efficient.
Another critical element of our collaboration with Intelligent Energy was Graphite Additive Manufacturing’s design refinement process. Leveraging their motorsport background, where precision is paramount, Graphite Additive Manufacturing worked extensively to determine the optimal build orientations and part-specific build parameters. By carefully selecting the placement of each component within the build envelope, they improved the repeatability of accuracy, strength, and appearance across every batch. This level of fine-tuning is a hallmark of motorsport engineering, where every detail matters, and it has translated perfectly into ensuring consistent quality for Intelligent Energy’s fuel cell components.
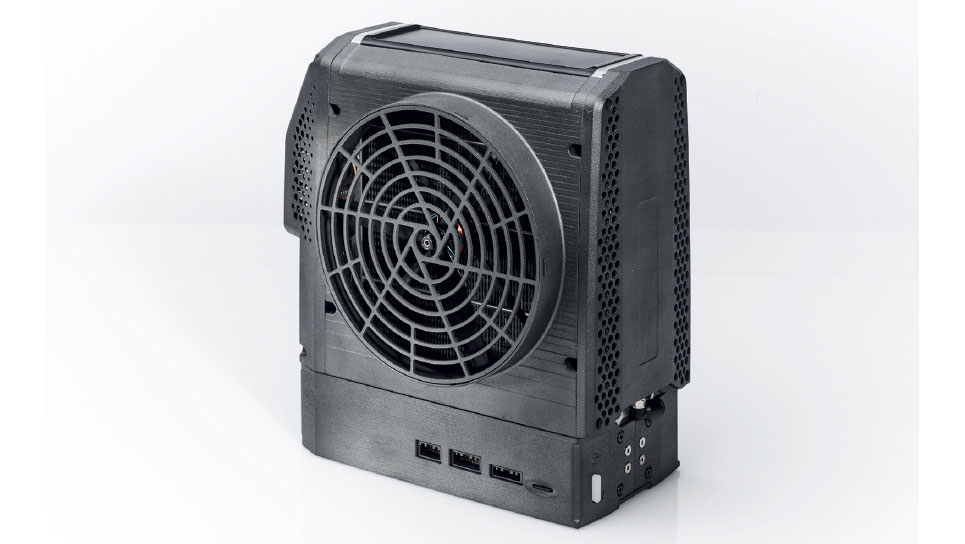
The final product not only meets the technical and mechanical needs of the fuel cell but also comes in a sleek black finish, aligning with Intelligent Energy’s aesthetic and branding requirements. While this may seem like a minor detail, the black colour eliminates the need for additional finishing processes, saving time and further reducing weight — another win for efficiency.
The crossover between motorsport and other industries is clear. The technologies developed on the track — advanced materials, innovative manufacturing techniques, and precise engineering — are now making their way into fields like clean energy and drone technology, driving the future of both industries. Graphite Additive Manufacturing is proud to be at the forefront of this evolution, helping companies like Intelligent Energy bring high-performance hydrogen fuel cells to the market with the same level of innovation that powers the world’s fastest cars.
“We have always found Graphite Additive Manufacturing great to work with, their range of materials has allowed us to achieve our goals of developing lightweight fuel cell products for drones, where reducing mass is critical for extending flight time,” says Tony Meadowcroft, Technical Lead at Intelligent Energy. “Using printed parts enables us to iterate designs quickly, and the consistently high build quality is suitable for our finished products.”
For more information, visit graphite-am.co.uk


